
General
How to Choose the Best Antivirus Software
Simplify your search for an antivirus software with this guide.
read moreFind the location nearest you
Published on: July 15th, 2016

Water damage is never fun, but it happens all the time. Morning coffee spills, late-night energy drinks, or even browsing the web poolside. Luckily, Computer Troubleshooters has come up with a 12 step MacBook water damage repair guide that you can easily do at home!
Most of us have fallen victim to water damage at one point or another. Here is how to save your MacBook when the inevitable occurs.
The faster you remove the battery after a liquid spill, the better. If the battery is wet, wipe it dry with a towel.
Remove the hard drive and check if the controller board on the bottom side of the drive is wet. If it is, dry that with a towel as well before turning it on.

Remove the motherboard and inspect all remaining internal gear and dry with a towel if necessary. The keyboard and trackpad are sealed parts, so there is not much you can do to dry the interior.
Examine both sides of the motherboard for any liquid damage as well as the MagSafe Board (power connector board).
Clean up any liquid damage/weathering using a toothbrush and isopropyl alcohol. If you spilled something sticky or a sugary drink like soda or liquor, use hot water to wipe it down. Any wet areas you find on the motherboard, dry them out thoroughly using a soft cloth without rubbing the motherboard. Then, clean these areas with a toothbrush and alcohol.
Inspect the following for liquid:
• Underneath the speaker
• Any ports on the side of the motherboard
• Both memory modules and memory slots
• All cable connectors (be cautious as some cable are fragile and rip easily)
Wait until the motherboard and other internal parts are fully dry. If you used DeoxIT contact cleaner, it might leave some residue, but that’s normal. To help the motherboard dry faster, you can use a hairdryer.
It’s important how you assemble the laptop back together after you dry everything. Before reinstalling the motherboard and connecting, plug the AC adapter into the MagSafe board.
The LED on the power plug has to turn on and stay solid green. If the LED doesn’t turn on, attempt to reconnect the MagSafe board to the motherboard and test it once more. If there is still no LED light, it’s possible the MagSafe board was damaged and has to be repaired.
The MagSafe board can be simply unplugged from the motherboard and replaced. You can search for a new replacement MagSafe board using the part number from the original board. If the LED light doesn’t turn on after substituting the MagSafe board, the motherboard is most likely fried.
You can continue to assemble the laptop if the LED light on the AC adapter plug turns on and stays solid green.

Install the motherboard into the MacBook and connect the following:
– Video cable
– Cooling fan
– Keyboard
– Memory (if you removed it earlier)
Plug in the AC adapter and turn on the laptop by pressing the power button. If the laptop turns on and there is a white screen with a folder and flashing question mark, that’s good. Turn it off, connect the hard drive, then try switching it on once more. If the laptop boots properly to the desktop, switch it off and start connecting the rest of the cables one by one and test it after each step.
If it doesn’t turn on after step 10, disconnect the laptop keyboard from the motherboard and turn it on with the power-on pads. If the laptop turns on using the power-on pads (while the keyboard is disengaged), then the keyboard is most likely damaged and has to be replaced.
If the laptop starts fine with the internal keyboard detached from the motherboard, go ahead and connect the rest of the cables and experiment with an external USB keyboard and mouse.
If everything goes well with an external keyboard attached but the laptop doesn’t start (or doesn’t function correctly) with the internal keyboard connected, it means the internal keyboard failed and must to be replaced.
We hope this DIY 12 step guide was useful and that your MacBook is back up and working again! If you need a professional repair, stop into Computer Troubleshooters. We can diagnose and repair your computer quickly and get it back up and running fast! Find a Computer Troubleshooters office near you.


Simplify your search for an antivirus software with this guide.
read more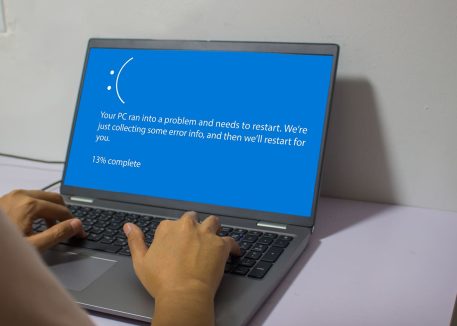
Have you received this notorious Windows error screen? Here’s how to fix it.
read more© 2026 Computer Troubleshooters.